Imagine you and some friends have just returned from a lovely day of outdoor exploration and cycling. Unfortunately, you discover that your front wheel has a puncture as you are driving home. There aren't many people in the area you're in, and there isn't a mechanic in sight. You don't have the cycle puncture kit, and neither do your friends. You don't want to ride on the punctured tyre any longer because that will destroy it. You search for someone who can fix the tyre while pushing your mountain bike. A memorable day came to an unfortunate and disastrous end, majorly because you did not carry a cycle puncture kit.
One of your bicycle's most important parts is the tyre. The only component of your bicycle that is constantly in contact with the ground is its tyres, which can either make your ride enjoyable and safe or, if properly maintained, make it puncture-prone.
While it is impossible to guarantee that you won't ever experience a tyre puncture, being ready with a cycle puncture kit can lessen the negative effects. One of the most frequent problems on a bike ride is getting a puncture. A cyclist should have a spare tyre and a cycle tool kit needed to replace a tyre with a puncture, just like any driver of a motor vehicle. Cars probably have a ready-to-replace spare, but a cyclist needs to have a spare tube and a bicycle pump with them. If possible, wait until after your trip to fix the flat or leak, unless you have no other choice.
While we'll go over how to quickly fix a tyre puncture, we also think it's important to provide advice on how to prevent a flat. By following our suggestions, you can prevent these upsetting occurrences and take advantage of cycling's awesomeness.
The most important tip would be to carry a cycle puncture kit with you no matter the distance of the journey you are undertaking.
You can also take these safety precautions to reduce your chance of getting a flat.
1) Press the tyre to check that it feels firm and is not over- or under-inflated. Incorrect tyre pressure is the main cause of punctures. The best strategy is to use a pump with a gauge to check the psi and adjust the level as necessary.
2) Perform a visual inspection before each ride. Some cyclists opt to perform a visual inspection after the ride to ensure that you're prepared, even if you're in a rush. Check the tyre visually for any cuts, cracks, or objects that may be lodged there. Remove any foreign objects by prying them out.
3) Pay attention to the road. Sharp objects like metal fragments, stones, nails, or even pieces of broken glass are frequently seen on the road, especially close to the gutter that many cyclists prefer to ride on. Avoid it and move slowly through it.
4) Even though you take all of these safety measures, you might eventually get a puncture.
When you are out riding, keep an eye on your tyres and check them occasionally to see if you can spot them when they have become soft. It is preferable to detect tyre softening than to wait until it is already flat. Check to see if the wheels bottom out on potholes or if the bicycle wobbles when turning if you experience brief hard bumps in the middle of a smooth ride. These are warning signs of a soft tyre and require your immediate attention.
Let's go over the steps you must take to fix a leak now that you are aware of the warning signs, preventative measures, and cues to recognise a flat.
Read This - Helpful Tips for E bike Repair & E bike Maintenance
1) Pry the tyre tube out
A desirable skill to master is removing the tube without completely removing the wheel and tyre. To remove the tube from the space between the wheel rim and the tyre, you will need at least two levers. While a punctured tube can be repaired without disassembling the entire wheel, the wheel must be taken apart in order to replace the tube.
2) Locate the Leak
If the leak is not immediately noticeable, inflate the tyre and listen for the hissing sound of air escaping. It might be difficult to locate a slow leak. As a last resort, you could also submerge the inflated tube in water and search for bubbles. then, keep in mind to thoroughly dry the tube before you can stitch it.
3) Polish the Leak Area
Buff the surface with a small piece of sandpaper from your patch kit or tyre repair kit, being sure to cover an area a little larger than the patch. If there is a moulding line that runs parallel to the leak, you should sand it down completely to prevent an air channel from forming there. Now use a dry hand or cloth to sweep or dust off the sanding dust.
4) Fix the Breach
With a clean finger, apply a small amount of glue and spread it out into a thin, even layer. Allow the glue to fully dry. Peel the foil now, and press a patch of the right size over the leaky area, preferably overlapping it by an inch all the way around. Making sure that no air is trapped underneath it, gently press the patch onto the tube starting at one end and moving to the other.
Be on the lookout for patch failures that can happen for these reasons.
1. You did not properly buff the surface with the sandpaper.
2. Not all of the patch size was covered by the glue or cement.
3. Putting the patch on before the adhesive has dried.
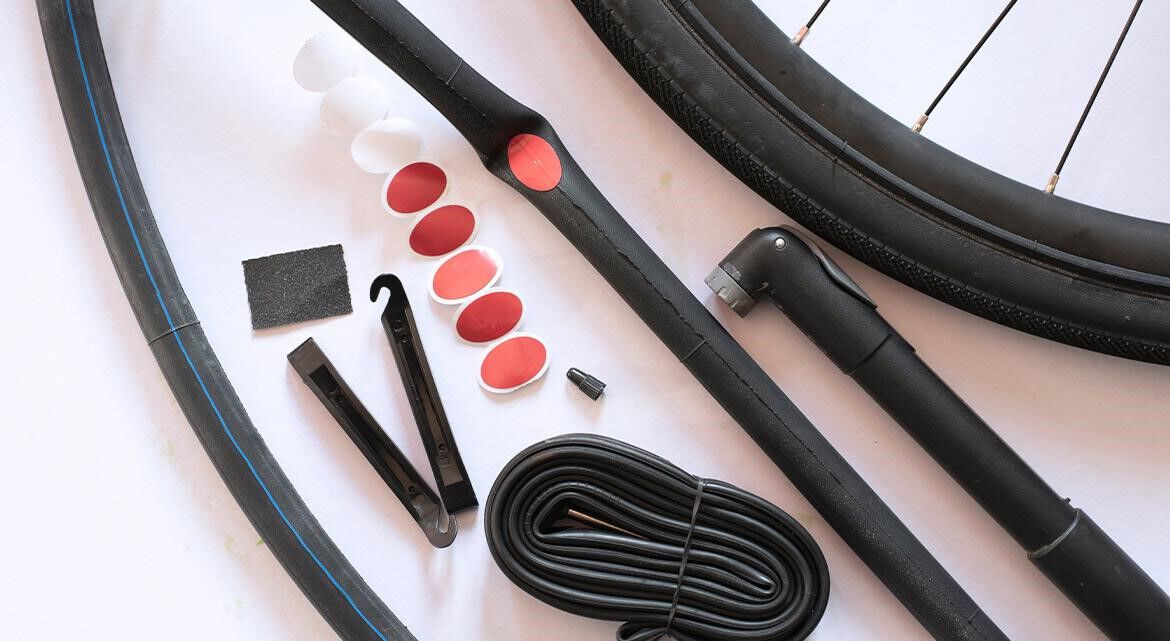
It is useful to make a list of the items in your portable cycle puncture kit.
1. First tyre levers
2. Two extra inner tubes, if not at least one.
3. Repairing large holes with patches, a piece of fine sandpaper, special rubber cement or glue, and some used tyre pieces.
4. A tyre pump, ideally one that has a gauge.
1. Multitool Set: A multitool kit is available primarily for adjusting and maintaining bicycles. The majority of them also have a chain tool, various Allen wrenches, hex wrenches, flathead and Philips screwdrivers, and other tools. With this kit, you can tighten any nuts and bolts on your e-bike. The wrench will also be useful to loosen the nuts holding the wheel when you have a tyre puncture. However, you can quickly remove the wheel from geared bicycles with quick-release clamps by pulling the lever.
2. Mini Portable Pump: You must pack a portable mini-pump that fits easily on the frame of your bicycle and is no bigger than a slim one-litre mineral water bottle as part of your cycle puncture kit. There are many options available. Try to find one with a pressure gauge built in.
3. Damage Repair Kit: A damage repair kit includes sandpaper, glue, and tube patches. All was required to patch a small hole.
4. Wheel Levers: Plastic ones that are lightweight are a great addition to your portable cycle puncture kit. A necessary tool to slide between the tyre and the wheel rim in order to pop the tyre off and patch the tube puncture. Don't give in to the urge to use a knife or any other sharp object. There is a chance that you will unintentionally damage the tube and tyre.
5. Extra Tube: An excellent addition to your cycle puncture kit in the event that the valve stem on one of your tyres has broken off or the tyre tube is beyond saving. Keep a spare tyre on hand, making sure it is the right size to fit the tyre on your bicycle. Find ones that are as light as possible.
If you're concerned about the inconvenience of having to carry around extra gear while riding, you can buy a top tube frame bag, handlebar bag, or a small saddle bag that can hold all the things that you wish to keep in your cycle puncture kit.